Car Shakes When Braking Causes and Fixes
Your car shakes when braking because uneven braking force reaches your hands, foot, or seat. Most often, bad brake rotors cause vibration by gripping and releasing pads unevenly during each wheel rotation. However, worn pads, sticking calipers, and loose suspension parts also create similar shaking under braking.
First, note exactly where you feel the vibration during each stop. Then, track the speed, pedal pressure, and road surface for each episode. Together, these details point mechanics toward the faulty corner or component quickly. Also, this guide explains each cause, check, and repair step by step.
Why a Car Shakes When Braking
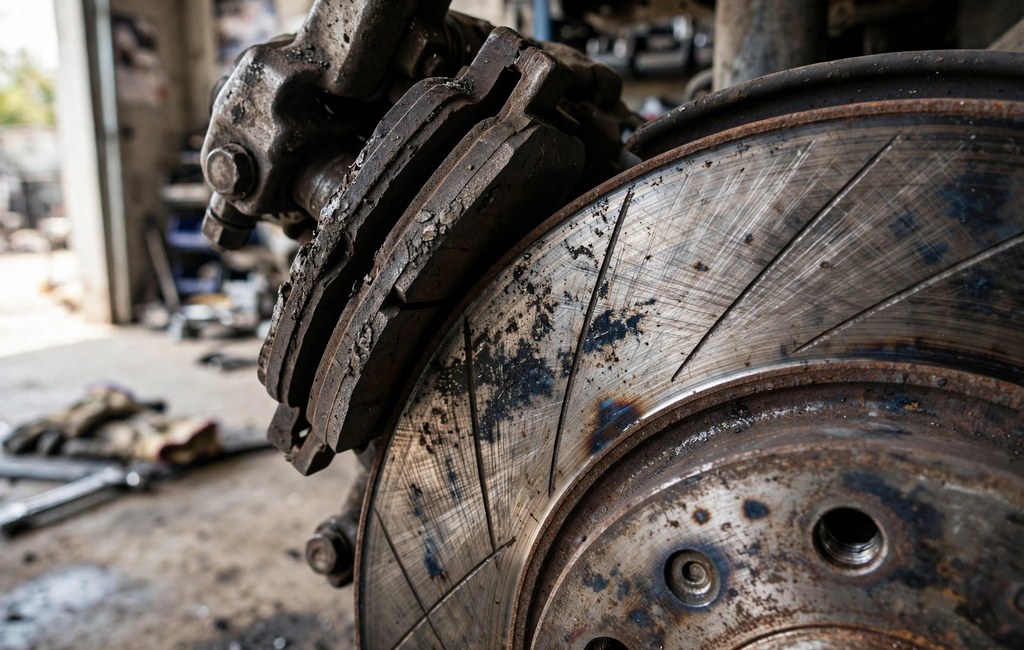
Braking turns motion energy into heat through friction at each wheel. Then, pads squeeze rotors, and friction slows the wheels in a controlled way. However, any uneven contact changes friction hundreds of times each minute.
For example, a thick rotor spot pushes the caliper piston backward during rotation. Next, a thin spot lets the piston move forward again moments later. As a result, the pedal, steering column, and body receive repeating pulses.
Also, the brake pedal links every wheel to your foot hydraulically. Therefore, pressure changes at any corner travel back almost instantly. Meanwhile, the steering system carries front wheel disturbances into your hands.
For example, imagine pads crossing a speed bump during every rotation. Then, each crossing pushes the piston and shakes connected parts rhythmically. As a result, the shake frequency matches wheel speed almost exactly.
Where You Feel Car Shakes When Braking
First, steering wheel shake usually points toward front brake or steering problems. In contrast, pedal pulsation often points toward rotor thickness problems at either axle. Similarly, seat or floor vibration often points toward rear brake problems.
Also, location gives clues, but location alone never confirms a diagnosis. Therefore, mechanics combine your description with measurements before they replace any parts. Meanwhile, repeating patterns across several stops strengthen the initial clue greatly.
Why the Shake Appears Only Under Braking
First, coasting removes pad pressure, so uneven rotor surfaces stop disturbing the ride. Then, light pedal pressure restarts contact, and the uneven surface creates vibration again. Therefore, braking-only vibration strongly suggests a brake or brake-loaded suspension fault.
However, braking also shifts vehicle weight forward onto the front axle. As a result, front tires carry more load, and front components work harder. Also, worn front parts flex more under that extra braking load.
How Braking Feels When the Car Never Shakes
First, healthy braking feels smooth, straight, and consistently firm throughout. Also, the pedal holds height while pressure stays steady and predictable. In contrast, faulty braking feels pulsing, grabbing, or uneven between stops.
Next, healthy stops track straight without steering correction from you. However, faulty stops may pull, shudder, or demand extra pedal effort. Therefore, compare each stop against that smooth and straight baseline. In short, your car shakes when braking because friction arrives in uneven pulses.
Common Causes When a Car Shakes When Braking

Several faults create braking shake, but rotors lead the list by far. For example, understanding abs pulsation vs bad brakes helps drivers avoid needless repairs. Also, each cause below leaves slightly different clues in feel and timing.
- Uneven rotors: They create rhythmic pulses through the pedal and steering wheel. Also, the pulse rate rises directly with road speed.
- Worn pads: They reduce smooth contact and add noise during braking. In addition, thin pads transfer more heat into rotors and calipers.
- Sticking calipers: They drag one pad, overheat one rotor, and cause pulling. Therefore, one wheel often runs hotter than the others.
- Loose suspension parts: They let wheels shift slightly under heavy braking loads. As a result, small brake pulses feel much larger inside.
- Tire and wheel faults: They add vibration that braking loads often amplify further. However, they usually shake during coasting as well.
First, rule out simple causes before you condemn expensive components. Then, match each symptom against the sections below in order. Finally, confirm every suspicion with inspection and measurement, not guesswork.
First, several faults often combine and amplify each other noticeably. For example, a sticking caliper overheats a rotor and creates deposits. Then, the damaged rotor shakes, while the caliper keeps dragging afterward.
Also, worn suspension parts rarely create vibration entirely by themselves. Instead, they magnify pulses that healthy brakes would never produce. Therefore, fixing only rotors may leave amplified shaking completely untouched.
Causes Ranked When a Car Shakes When Braking
First, rotor surface problems cause most braking vibration cases overall. Next, pad and caliper faults cause many remaining cases frequently. Finally, suspension, tire, and bearing faults cause fewer but important cases.
Warning Signs That Travel With Car Shakes
Also, squealing, grinding, or scraping noises often accompany braking vibration. For example, grinding usually means pads have worn down to metal. Therefore, noise plus vibration demands prompt inspection, not continued driving.
Meanwhile, longer stopping distances signal reduced friction contact somewhere in the system. Similarly, a soft or low pedal signals hydraulic trouble beyond simple vibration. In contrast, a firm pedal with shaking usually signals mechanical unevenness. Therefore, a car shakes when braking whenever one corner grips harder than another.
How Brake Rotors Cause Shaking When Braking
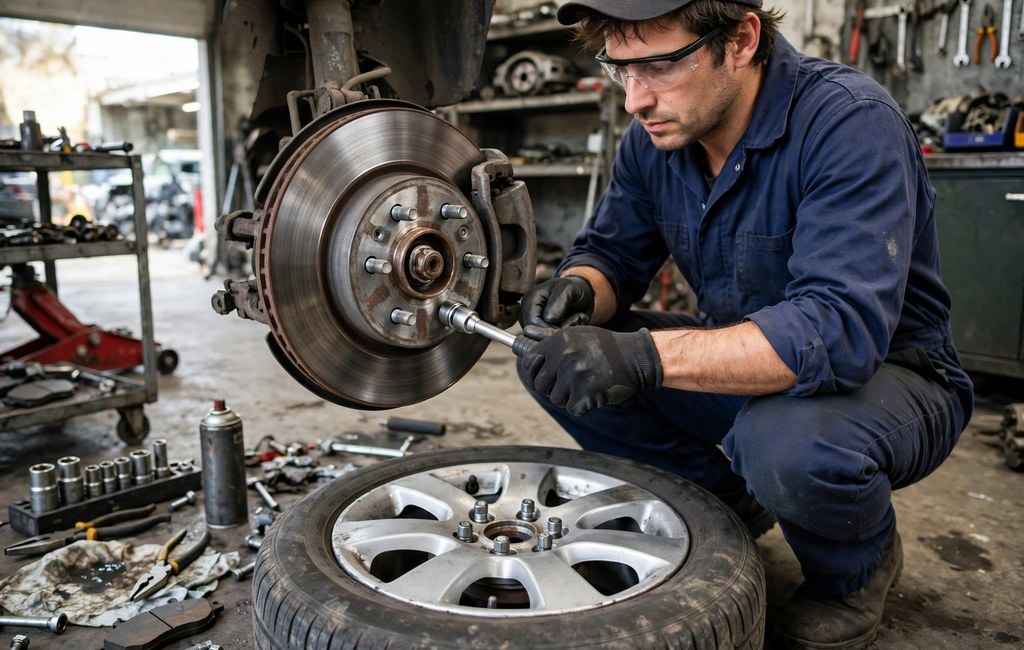
Thickness Variation Explained
First, healthy rotors keep nearly identical thickness around the full friction surface. However, uneven wear makes some sections thicker than neighboring sections. Then, each thick section squeezes through the pads once per rotation.
As a result, clamping force rises and falls with every wheel revolution. Next, the caliper piston pumps in and out against the brake fluid. Therefore, your foot feels a steady pulse through the pedal.
Lateral Runout Explained
First, runout describes a rotor wobbling sideways as it spins. For example, rust or debris between the hub and rotor creates runout. Also, uneven lug nut tightening distorts the rotor mounting surface slightly.
Then, the wobbling rotor knocks pads back into the caliper repeatedly. Over time, that contact wears thin spots into the rotor surface. As a result, simple runout gradually grows into measurable thickness variation.
Pad Deposits When a Car Shakes When Braking
First, pads normally leave a thin, even transfer film on rotors. However, holding hot pads against a stopped rotor imprints uneven deposits. Then, each deposit acts like a thick spot during later braking.
For example, a hard stop followed by a long red light often starts deposits. Meanwhile, repeated hard stops overheat sections and create hard hot spots. Therefore, driving habits shape rotor surfaces more than many drivers expect.
- Thickness variation: It changes clamping force once during every wheel rotation. Therefore, it produces the classic rhythmic pedal pulse.
- Lateral runout: It wobbles the rotor and knocks pads backward repeatedly. Over time, it wears true thickness variation into the surface.
- Pad deposits: They build uneven high spots from transferred pad material. As a result, they mimic thickness variation almost exactly.
- Hot spots: They harden small areas and change local friction levels. Similarly, they create grabbing and releasing during each rotation.
Also, drivers often call all these faults warped rotors for simplicity. However, true heat warping of a cast rotor happens quite rarely. Therefore, precise terms help mechanics choose the correct repair first.
Also, rotor problems grow gradually over thousands of braking events. First, tiny runout wears one area slightly more each week. Then, measurable thickness variation develops and strengthens the pulse steadily.
Meanwhile, heat accelerates every stage of rotor surface damage significantly. For example, long descents hold pads against hot rotors for minutes. As a result, mountain driving often reveals rotor faults first.
Signs Your Rotors Need Attention
First, look for scoring, grooves, or discolored patches on rotors. Also, blue or dark spots suggest overheating during previous hard stops. However, dangerous thickness variation often hides from simple visual checks.
Therefore, visual checks support measurements, but they never replace measurements. Next, measure first, then decide between resurfacing and full replacement. Finally, always clean hub faces before fitting any rotor again. Simply put, the car shakes when braking because each rotation repeats the same uneven grip.
Worn Pads When a Car Shakes When Braking
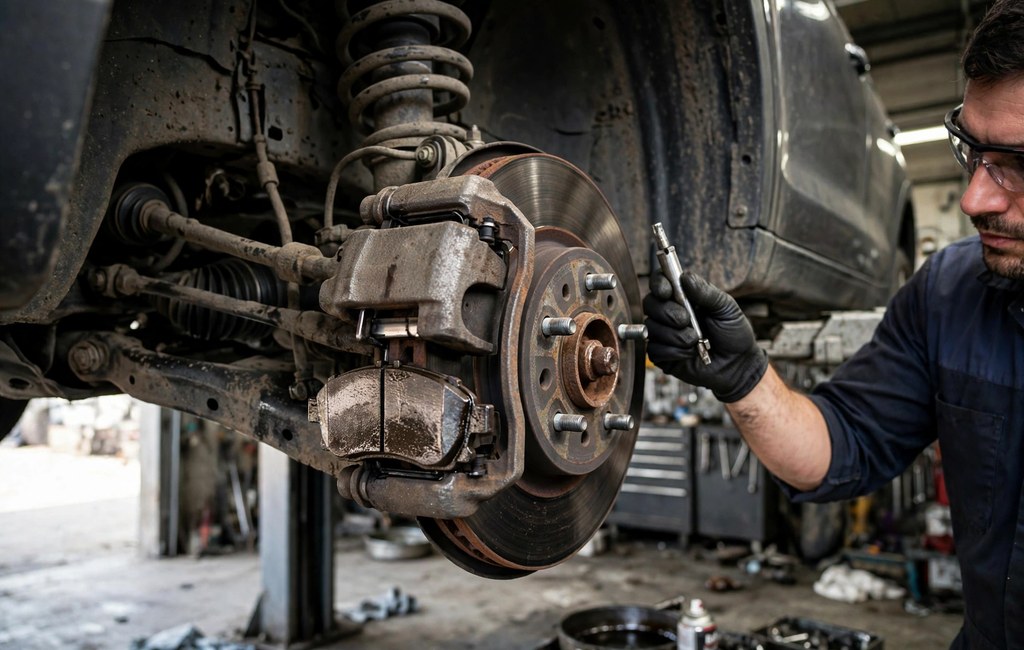
How Worn Pads Create Vibration
First, pads wear thinner and lose their flat, even contact surface. Then, tapered or uneven pads grip rotors in shifting patches. As a result, braking force surges and fades during each stop.
Also, pads worn to their backing plates cut grooves into rotors. For example, metal contact adds grinding noise plus harsh vibration together. Therefore, worn pads quickly damage rotors that were previously healthy.
Also, pad material choice and bedding quality shape future vibration risk. For example, poor bedding leaves patchy transfer films on new rotors. Then, those patches mature into pulsation within relatively few miles.
How Calipers Apply Even Pressure
First, hydraulic pressure pushes the piston against the inner pad. Then, the sliding caliper pulls the outer pad inward equally. As a result, both pads clamp the rotor with balanced force.
However, corrosion blocks that sliding motion and unbalances the clamp. Next, the inner pad wears faster and overheats its rotor face. Therefore, balanced wear proves the caliper still slides freely.
Sticking Calipers Behind Car Shakes When Braking
First, calipers must slide freely so both pads share clamping work. However, corroded slide pins freeze one pad against the rotor. Then, that pad drags constantly and overheats its rotor section.
As a result, the car often pulls toward the dragging brake side. For example, drivers reporting car shakes and pulls to one side when braking often have caliper trouble. Therefore, mechanics always check pull direction during the road test.
Also, a sticking piston holds pressure after you release the pedal. Meanwhile, the affected wheel may smell hot after short drives. In addition, fuel use may rise because the brake keeps dragging.
Meanwhile, seized caliper hardware often hides behind apparently normal pad thickness. Therefore, inspect slide movement whenever pads wear unevenly between sides. In addition, check dust boots for tears that admit water and grit.
- Uneven pad wear: It shows one pad thinner than its partner pad. Therefore, it points toward caliper slide or piston trouble.
- Glazed pads: They develop shiny surfaces that grip rotors inconsistently. As a result, they add chatter during light braking especially.
- Dragging brakes: They overheat one rotor and distort its friction behavior. Similarly, they often pull the car toward that side.
First, never replace pads alone when caliper movement looks restricted. Instead, restore caliper movement, or the new pads will wear unevenly. Finally, balanced pad wear confirms calipers apply force evenly again. As a result, your car shakes when braking through the wheel, the pedal, or the seat.
Suspension and Steering Problems That Shake Under Braking
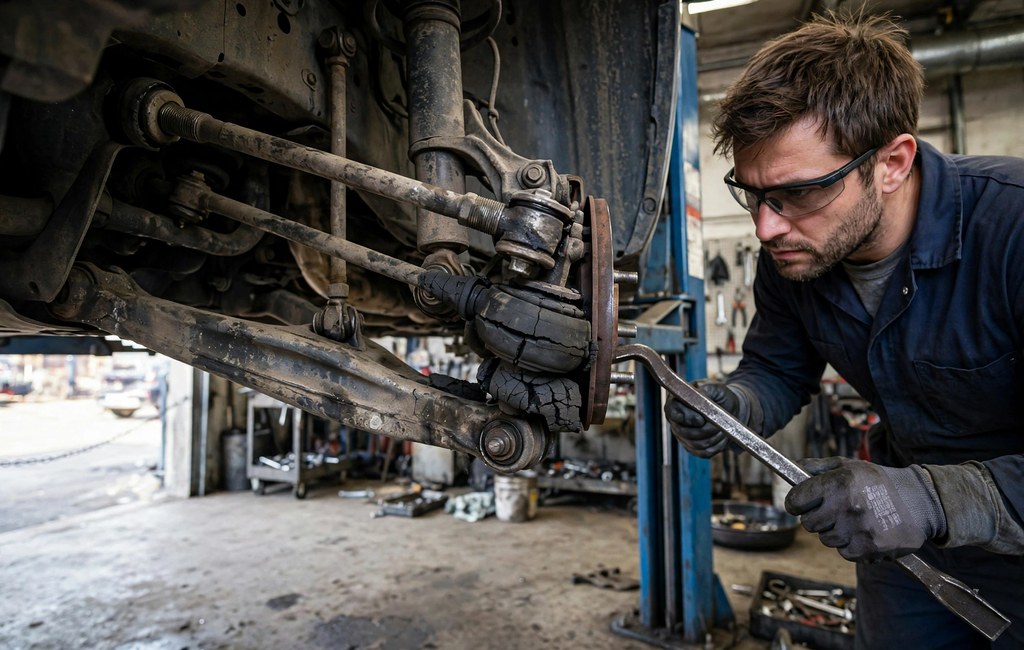
First, brakes create the force, but suspension parts control wheel movement. For example, worn parts behind bad suspension shaking when braking let wheels wobble under load. However, healthy suspension holds wheels steady while braking forces peak.
Tie Rods, Ball Joints, and Bushings
First, worn tie rod ends let front wheels steer slightly by themselves. Then, braking loads push those wheels in and out repeatedly. As a result, the steering wheel shakes beyond normal rotor feedback.
Also, worn ball joints allow vertical and lateral wheel play. Meanwhile, cracked control arm bushings let whole arms shift under braking. Therefore, small rotor pulses become large shakes through loose joints.
Also, the steering rack and its mounts hold front wheels aligned. However, worn rack bushings let the whole rack shift slightly. Then, braking forces move wheels together and shake the steering wheel.
Similarly, worn bearings within the steering knuckle add unwanted play. Therefore, steering, suspension, and bearing checks overlap during diagnosis frequently. In contrast, replacing rotors alone cannot correct looseness anywhere else.
How Suspension Faults Mimic Brake Faults
For example, loose parts may stay quiet during gentle coasting conditions. Then, braking load compresses bushings and exposes hidden play instantly. In contrast, pure rotor faults pulse evenly regardless of steering angle.
Also, suspension shake often changes when you brake while turning. Similarly, clunks during stops suggest loose parts rather than rotors. Therefore, mechanics check front-end play before they condemn brake parts.
Also, worn struts or shocks let wheels bounce during braking bumps. Then, bouncing tires vary their grip and add secondary shaking. As a result, weak damping worsens any brake-related vibration present.
- Tie rod wear: It lets wheels toe in and out under braking. As a result, it shakes the steering wheel side to side.
- Ball joint wear: It allows uncontrolled wheel movement over braking bumps. Therefore, it adds looseness plus occasional clunking noises.
- Bushing damage: It lets control arms shift forward under braking load. Similarly, it creates shudder that varies with pedal pressure.
First, mechanics pry and load each joint while watching for movement. Next, they compare wheel play against manufacturer expectations for that model. Finally, they road test again after repairs to confirm improvement. In practice, a car shakes when braking most clearly during firm, repeated stops.
Tire and Wheel Faults When a Car Shakes When Braking
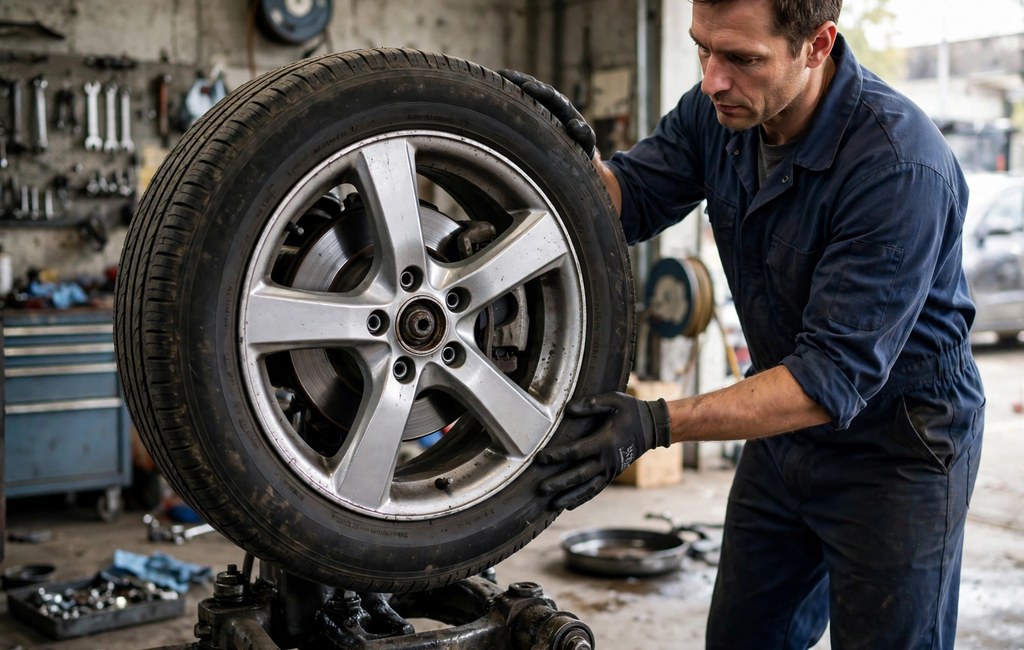
Tire and Wheel Faults
First, unbalanced tires shake more as speed rises during driving. However, braking weight transfer loads front tires and amplifies their vibration. Then, drivers may blame brakes for a mainly tire-based problem.
For example, a bent rim wobbles once during every wheel rotation. Also, a tire with internal belt damage bulges and thumps rhythmically. Therefore, coasting tests help separate tire faults from brake faults.
Also, tire wear patterns reveal alignment and suspension problems clearly. For example, cupped tires thump and vibrate during braking and cruising. Therefore, inspect tread condition whenever vibration complaints involve tires.
Meanwhile, a damaged tire may shake only under braking load transfer. First, braking pushes weight forward and loads the damaged front tire. Then, its defect flexes more and produces stronger vibration pulses.
Wheel Bearing Problems
First, worn bearings let the hub and rotor tilt slightly. Then, the tilting rotor gains runout and contacts pads unevenly. As a result, bearing wear eventually creates genuine brake pulsation too.
Also, failing bearings usually hum or growl while you drive. Meanwhile, the noise often changes when you steer side to side. Therefore, noise plus braking shake should trigger a bearing check.
- Balance problems: They shake the car at steady cruising speeds too. In contrast, pure brake faults shake only under braking.
- Bent wheels: They wobble visibly during slow rotation checks on lifts. As a result, they pulse once per wheel revolution constantly.
- Loose lug nuts: They let wheels shift against the hub dangerously. Therefore, they demand immediate tightening to the manufacturer specification.
First, always confirm lug nuts hold the correct tightness values. Then, tighten them in a star pattern to the manufacturer specification. Finally, recheck wheel mounting whenever vibration follows recent tire service.
Separating Tire Shake From Car Shakes When Braking
First, coast at the problem speed without touching the brakes. Next, note whether vibration continues during that unbraked coasting phase. As a result, continuing vibration points toward tires, wheels, or bearings.
In contrast, vibration that starts only with pedal application points toward brakes. However, combined faults can blur this simple test result significantly. Therefore, use the coasting test as guidance, not final proof. Over time, the car shakes when braking worse as surfaces wear further out of round.
Steering Wheel Shake Versus Brake Pedal Pulsation
First, front brakes connect mechanically to the steering wheel directly. Therefore, front rotor faults usually shake the wheel most noticeably. In contrast, rear brake faults usually travel through the seat.
For example, a clear pattern of steering wheel shakes when braking usually implicates front rotors first. Also, front tie rod wear can amplify that same wheel shake. Meanwhile, the pedal may stay almost calm during front faults.
What Pedal Pulsation Tells You
First, pedal pulsation reflects hydraulic pressure changes inside the brake system. Then, thickness variation pushes fluid back toward your foot rhythmically. As a result, pedal feel often reveals rotor problems very early.
However, rapid pedal pulsing during a hard stop may signal ABS activity. For example, ABS pumps the brakes rapidly on slippery road surfaces. Therefore, context matters: slippery surfaces suggest ABS, dry roads suggest faults.
What Seat and Floor Vibration Tells You
First, rear rotors and drums sit far from the steering system. Therefore, their faults vibrate the seat, floor, and body shell mainly. Also, rear tire faults create a similar seat-centered vibration pattern.
Meanwhile, whole-car shaking suggests a severe or combined fault picture. For example, sticking rear calipers plus worn rear rotors shake everything. As a result, broad vibration deserves a full four-wheel brake inspection.
- Wheel shake: It usually signals front rotor or front steering trouble. Therefore, inspect front brakes and tie rods first.
- Pedal pulse: It usually signals rotor thickness variation somewhere in the system. Similarly, it can signal normal ABS during slippery stops.
- Seat shake: It usually signals rear brake or rear tire trouble. In contrast, it rarely comes from front rotors alone.
Also, many drivers feel vibration in two places at once. For example, severe front rotor faults shake wheel and pedal together. Therefore, dual symptoms usually signal stronger faults, not two faults necessarily.
Meanwhile, symptom location narrows the search, but measurements finish it. First, start at the axle your symptoms suggest most strongly. Then, verify the other axle before you finish the inspection.
Building Your Symptom Notes
First, write down location, speed, and pressure for each episode. Also, record noise, pulling, and any warning lights you notice. Finally, hand those notes to your mechanic at check-in time.
Why Car Shakes Grow When Braking at Different Speeds
First, faster wheel rotation repeats each rotor fault more often. For example, car shakes when braking at high speeds often trace to slight rotor runout. As a result, mild faults appear only during fast highway stops. Meanwhile, city driving may hide those same faults almost completely.
Also, higher speeds add heat during each braking event quickly. Then, hot rotors expand unevenly and worsen existing surface variation. Therefore, long downhill braking often reveals vibration most clearly.
Also, moderate highway braking often produces the strongest rotor pulsation. First, wheel speed multiplies fault frequency into a noticeable range. Then, sustained pressure keeps pads engaged through many faulty rotations.
In contrast, car shakes when braking at low speeds usually signal larger mechanical faults. For example, severely worn pads or loose parts shake even gently. Similarly, out-of-round rear drums thump noticeably during slow stops.
In contrast, parking lot stops repeat faults too slowly for shaking. Instead, drivers feel slow surging or gentle rocking during creep stops. Therefore, low-speed surging also deserves rotor and drum checks.
First, track the exact speed where shaking starts and fades. Then, note whether gentle or firm pressure changes the shaking. Finally, share those details, because speed patterns narrow diagnosis greatly.
Pressure and Load Effects
Also, firm braking presses pads harder against uneven rotor surfaces. As a result, firm stops usually intensify rotor-related shaking noticeably. In contrast, suspension play may shake more under moderate pressure changes.
However, very light braking sometimes skips across deposits without gripping. Then, the shake may vanish until you press slightly harder. Therefore, inconsistent feel across pressures supports a surface-related diagnosis.
Temperature Effects Across Speeds
Meanwhile, cold brakes may hide faults during the first stops. Then, heat builds and the shaking grows during later stops. As a result, a shake that worsens when hot suggests surface problems.
However, suspension looseness usually shakes from the very first stop. Similarly, tire defects usually appear regardless of brake temperature. Therefore, temperature patterns help separate component groups during diagnosis. For that reason, your car shakes when braking until the uneven surface gets corrected.
How Mechanics Diagnose Why a Car Shakes When Braking
First, mechanics start with a structured road test, not parts replacement. For example, drivers can safely diagnose brake vibration at home before any shop visit. Then, they record speed, location, and pedal feel during braking.
The Road Test and Interview
First, your description tells the mechanic where to look first. Also, the road test confirms which axle produces the vibration. Then, the mechanic varies speed and pressure during controlled stops.
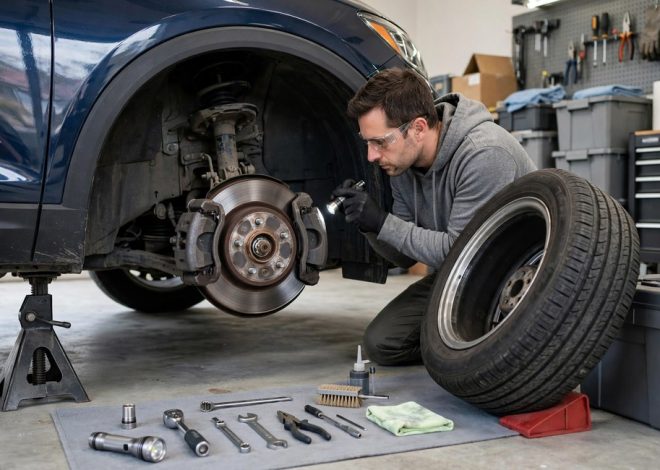
First, the inspection continues on a lift with wheels removed. Next, technicians rotate each hub and watch rotor movement closely. Then, they measure and record values for every wheel position.
Measurements That Confirm the Fault
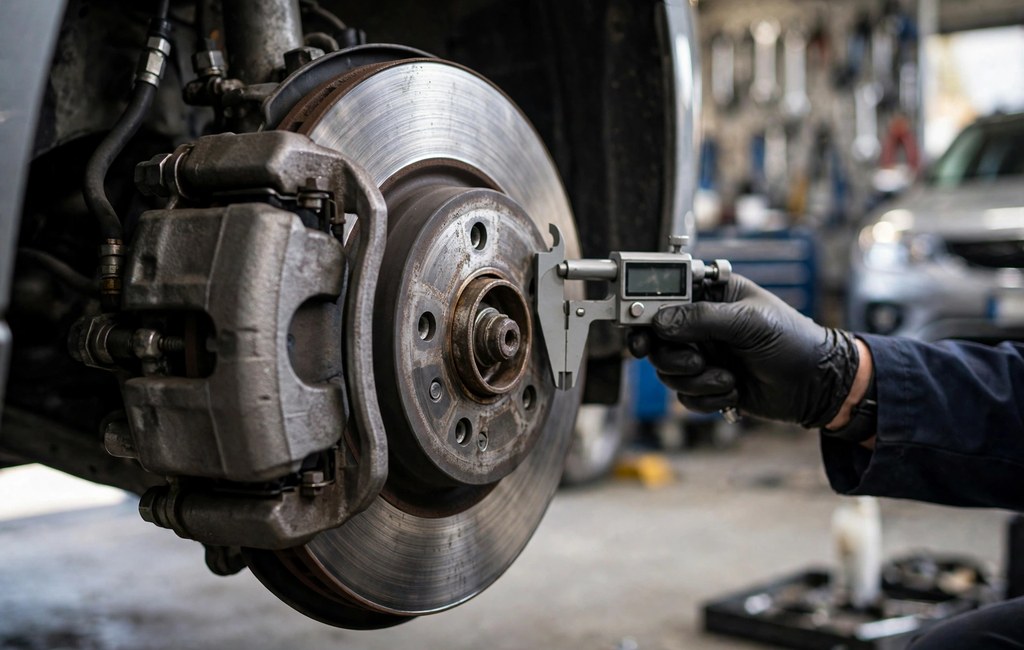
First, a dial indicator measures rotor runout against manufacturer limits. Next, a micrometer measures rotor thickness at several points around. Then, mechanics compare remaining thickness against the stamped rotor minimum.
Also, they inspect pad thickness and wear patterns on both sides. Meanwhile, they check caliper slide movement and piston retraction carefully. Finally, they test bearing play and suspension joint movement directly.
Also, technicians inspect hoses, boots, and mounting hardware during disassembly. For example, cracked hoses can hold pressure and mimic caliper faults. Therefore, thorough inspection prevents misdiagnosis and repeat repair visits.
- Runout checks: They reveal sideways rotor wobble during rotation clearly. Therefore, they expose hub dirt and mounting problems.
- Thickness checks: They reveal variation around the rotor circumference accurately. Similarly, they confirm whether resurfacing remains possible safely.
- Hub cleaning checks: They reveal rust buildup behind the rotor mounting face. As a result, they prevent repeat pulsation after repairs.
First, good diagnosis replaces guesswork with measurement across the whole system. However, skipping measurements often leads to repeat vibration within months. Therefore, insist on numbers before you authorize any brake repair.
What a Good Diagnostic Report Contains
First, the report lists runout and thickness numbers per wheel. Also, it notes pad thickness and wear pattern per corner. Finally, it recommends repairs based on those recorded measurements.
Meanwhile, you should ask which measurement failed its specification exactly. In addition, ask whether hub cleaning changed the runout reading. As a result, those answers reveal diagnostic quality before you pay. Put simply, a car shakes when braking because grip rises and falls every revolution.
Common Repairs for a Car That Shakes When Braking
Rotor and Pad Repairs
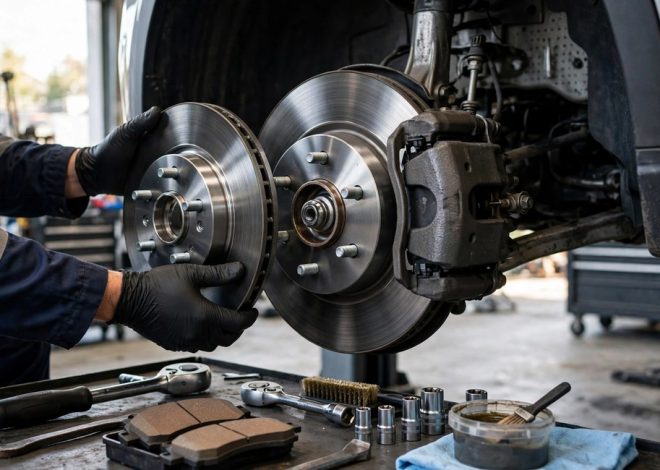
First, technicians resurface rotors only when thickness stays safely sufficient. Specifically, resurfacing must leave thickness above the stamped minimum thickness. Otherwise, replacement becomes the only safe rotor repair option.
Also, new pads should accompany resurfaced or replaced rotors usually. Then, proper bedding spreads an even transfer film across rotors. As a result, matched parts restore smooth and even braking contact.
Also, technicians often replace rotors and pads together as matched sets. Then, matched bedding creates one even friction film across surfaces. In contrast, mixing old and new friction parts invites uneven transfer.
First, always address the root cause before fitting new parts. For example, free a sticking caliper before installing new pads. Otherwise, the new parts inherit the old fault and fail early.
However, some drivers report their car shakes after new brakes arrive. For example, uncleaned hubs or uneven lug torque usually cause that. Therefore, correct installation matters as much as new parts themselves.
Caliper, Suspension, and Wheel Repairs
First, technicians free or replace sticking caliper pins and pistons. Next, they replace worn tie rods, ball joints, and bushings. Finally, they balance tires and repair or replace damaged wheels.
Also, they clean hub faces and tighten wheels in sequence. Then, they road test the car under varied braking conditions. As a result, the test confirms the vibration has truly gone.
Habits That Prevent Repeat Vibration
Also, avoid holding hot pads against rotors after hard stops. For example, creep forward slightly at long lights after stopping. Meanwhile, brake earlier and gentler to reduce rotor heat buildup.
- Torque discipline: It prevents rotor distortion during every wheel installation. Specifically, tighten lug nuts in a star pattern evenly.
- Proper bedding: It lays an even transfer film on new rotors. As a result, it prevents early deposit-related pulsation problems.
- Regular inspections: They catch pad wear before rotors suffer damage. Therefore, they reduce repair scope and restore safety sooner.
First, schedule brake inspections during routine tire rotations regularly. Also, report new noises or pedal changes between those inspections. Finally, small early repairs prevent larger cascading brake damage later.
Maintenance Habits That Prevent Car Shakes When Braking
Also, rotate tires on schedule and inspect brakes during rotation. Next, flush old brake fluid according to the manufacturer schedule. Finally, fix small leaks and noises before they cascade further.
Meanwhile, gentle braking habits extend every component service life significantly. For example, coast down earlier instead of braking late and hard. As a result, rotors stay cooler and surfaces stay more even.
When a Car Shakes When Braking Becomes Dangerous
First, mild pulsation rarely disables braking during a single stop. However, vibration always signals uneven contact and reduced braking efficiency. Therefore, worsening vibration steadily erodes your safety margin during emergencies.
For example, shaking plus grinding means pads have reached metal. Similarly, shaking plus pulling threatens directional control during hard stops. As a result, those combinations demand immediate professional attention, without delay.
Also, vibration reduces tire contact consistency during each stop noticeably. Then, the anti-lock system may intervene earlier on rough surfaces. As a result, stopping distances grow, especially during wet weather stops.
First, never ignore new vibration simply because the car still stops. Instead, treat vibration as early warning of declining braking performance. Finally, early repairs protect both safety and surrounding components alike.
Red Flags That Need Immediate Help
- Grinding noises: They signal metal contact destroying the rotor surface. Therefore, stop driving and arrange inspection immediately.
- Long stopping distances: They signal lost friction at one or more wheels. Similarly, they raise crash risk during every stop.
- Strong pulling: It signals uneven braking force across the axle. As a result, hard stops may swerve the car unexpectedly.
- Pedal sinking: It signals hydraulic failure rather than simple vibration. In contrast, it can remove braking ability very suddenly.
Also, vibration that grows quickly over days deserves urgent attention. Meanwhile, fluid leaks near wheels signal serious hydraulic danger too. Finally, treat any brake warning light plus vibration as urgent.
Deciding Whether to Drive to the Shop
Also, gentle short drives to a nearby shop may remain reasonable. However, grinding, pulling, or sinking pedals demand towing instead. Therefore, judge the full symptom picture, not vibration alone.
First, reduce speed and increase following distance during necessary drives. Next, avoid highways and heavy traffic until repairs finish completely. Finally, choose towing whenever you doubt your stopping ability.
Frequently Asked Questions
Why does my car shake when I brake at high speed?
High-speed braking exposes slight rotor runout and thickness variation repeatedly, so small surface faults create strong shaking.
Is it safe to drive with brake vibration?
However, limit driving and book inspection promptly, because vibration signals uneven braking and reduced stopping power.
Can bad rotors cause steering wheel shaking?
Yes, uneven front rotors shake the steering wheel because front brakes connect directly to the steering system.
How do mechanics check for warped rotors?
Mechanics measure rotor runout with a dial indicator and thickness with a micrometer at several points.
Why does my car shake after new brakes?
New brakes shake when installers leave hub rust, apply uneven lug torque, or skip proper bedding procedures.
Conclusion
First, braking shake almost always traces to uneven friction or looseness. Also, where you feel it guides you toward the right corner. Therefore, match the feel, speed, and pressure pattern before replacing parts.
Also, you now know how rotors, pads, calipers, and joints contribute. Next, use the symptom location and speed pattern as your guide. Meanwhile, remember that measurements, not guesses, confirm every brake diagnosis.
Next, book a brake inspection this week and share your notes. Finally, learn whether it is safe to drive a car that shakes when braking before your trip.