Coleman Mini Bike Modifications: 7 Best Upgrades to Make First
One of the best things about owning a Coleman mini bike is how well it takes to upgrades. The 196cc platform has been around long enough that the community has done the trial and error for you. There’s a well-established order to the mods, a clear sense of which ones are worth the money, and no shortage of people who’ve documented exactly what to do.
This guide covers the seven modifications that Coleman riders do most, ranked roughly from the easiest and cheapest to the more involved. You don’t have to do all of them. Pick the best Coleman Mini Bike that match where you want to take the bike.
1. Governor Removal (Free, Do This First)
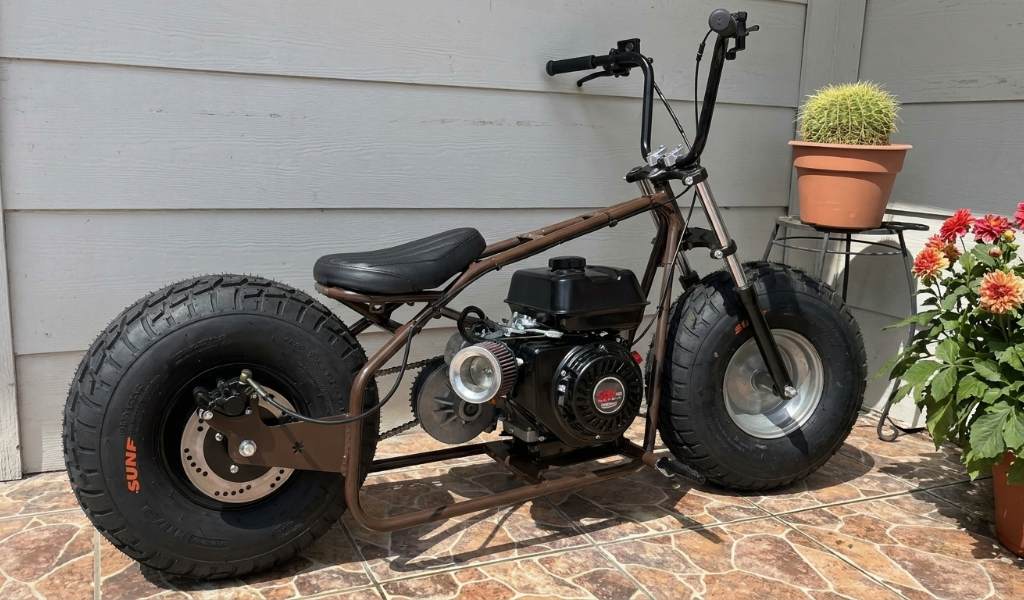
The governor is a mechanical device inside the engine that caps RPMs at around 3,600. It’s there to protect the stock internals and keep the bike in a safe speed range for new riders. It’s also the single biggest thing limiting your fun.
Removing or disabling it is free, takes around 20 minutes, and is the first thing most Coleman owners do. Top speed jumps from the low 20s into the 30 to 38 mph range with no other changes. One rider on a farming forum documented a GPS-verified jump to 31 mph just from this one step.
One important note: if you remove the governor, add 18-pound heavy duty valve springs at the same time. The stock valve springs are tuned for the governor-limited RPM range. Running the engine higher without upgrading the springs can lead to valve float at higher RPMs. The springs are inexpensive and sold widely as a direct upgrade for this exact purpose.
Cost: Free to remove. Valve springs cost around $10 to $20.
Difficulty: Beginner.
2. Stage 1 Performance Kit (Carb, Exhaust, Air Filter)
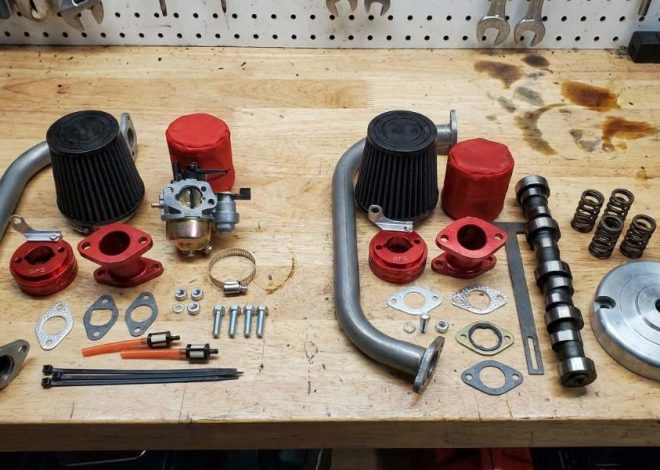
Once the governor is gone, the stock carb and exhaust become the next limiting factors. A Stage 1 performance kit tackles both of those at once and adds an upgraded air filter to complete the intake-to-exhaust flow improvement.
The kit includes a Coleman header pipe, a performance muffler, a Stage 1 carburetor pre-jetted with a .038 main jet, and a high-flow air filter. Each piece works with the others rather than fighting against a mismatched setup. The expected gain is around 2 to 3 HP on top of the stock 6.5 HP rating.
Riders who have done governor removal and Stage 1 together consistently describe the bike as feeling completely transformed. One owner on GoPowerSports put it plainly: “These two upgrades make these bikes monsters.” That’s not unusual feedback in the community.
Cost: $80 to $120 for the full kit.
Difficulty: Beginner. No engine disassembly. Most people finish in an hour or two.
3. Torque Converter (The Clutch Upgrade That Changes Everything)
The stock centrifugal clutch on the CT200U does its job at stock speeds. Once you’ve removed the governor and added a Stage 1 kit, the clutch starts feeling like the weak link. It engages abruptly, doesn’t handle hill climbing particularly well, and can’t use the extra power from your upgraded engine as efficiently as it should.
Swapping in a torque converter changes all of that. A torque converter uses variable sheaves to continuously adjust the drive ratio based on load and speed, similar to a CVT. The result is smoother engagement from a stop, better low-end pull on hills, and a more usable spread of power across the RPM range.
Coleman 200-series bikes use an uncommon 16mm crankshaft on most models (though some later models use a 3/4″ crankshaft), so make sure you buy a kit specifically designed for the Coleman 200 series rather than a generic unit. GoPowerSports sells a Coleman-specific torque converter kit built around this spec.
One rider described the combination of governor delete, Mikuni carb, straight pipe exhaust, torque converter, and 18-pound valve springs taking them to 45 mph. That’s a very different bike from stock.
Cost: $70 to $100 for a Coleman-specific kit.
Difficulty: Intermediate. You’re removing the old clutch assembly and fitting the converter. It’s a bigger job than the Stage 1 kit but well within reach for a mechanically confident person.
4. Gear Ratio Change (Cheap Speed Tuning)
Most stock Coleman 200-series bikes leave the factory with a roughly 6:1 gear ratio using a 60-tooth rear sprocket and a 10-tooth front sprocket. This setup prioritizes acceleration over top speed, which makes sense for trail riding but limits how fast the bike can go at the top end.
Switching to a lower numerical ratio like 5:1 by going to a 50-tooth rear or a 12-tooth front sprocket shifts the balance toward top speed. Popular combinations in the community are 50T/10T and 60T/12T. The cost is low, the swap is straightforward, and you can experiment with different combinations until you find the ratio that feels best for your riding style and terrain.
Just keep in mind that gearing for top speed reduces low-end torque. If you’re riding hilly terrain or soft ground, staying closer to stock gearing or even going a bit lower may serve you better. The torque converter from Mod 3 partially offsets this trade-off by handling low-speed torque automatically.
Cost: $15 to $40 per sprocket depending on size.
Difficulty: Beginner. A new sprocket and chain adjustment is entry-level mechanical work.
5. Front Suspension Kit (CT200U and BT200X)
The base CT200U has no front suspension. The large low-pressure tires do a reasonable job on mild terrain, but once you start riding anything rougher they transfer a lot of shock directly through the frame and into the rider. After you’ve upgraded the engine and the clutch, the lack of suspension becomes the most noticeable remaining limitation.
GoPowerSports makes a front suspension kit specifically for the Coleman CT200U and BT200X that replaces the rigid fork assembly with a set of telescoping suspension forks. It includes the fork assembly, upper fork plate, lower fork clamp, and handlebar components. The kit uses a 10mm steering neck bolt, which is standard on these frames.
The difference in ride quality on rocky or rooted trails is significant. The forks absorb impacts that would otherwise rattle your hands off the bars and compress your spine. If you ride off-road seriously, this one is genuinely worth the money.
Cost: $150 to $200 for the complete kit.
Difficulty: Intermediate. You’re replacing the entire front fork assembly, which requires some confidence with the mechanical side of things. The recommendation from the vendor is to have it installed by a qualified mechanic or experienced builder if you’re new to this kind of work.
6. Brake Upgrade (Often Overlooked, Always Worth Doing)
When you start going faster, the stock braking setup on a CT200U stops feeling adequate pretty quickly. The base model uses a single rear drum brake, which is fine at stock speeds but underwhelming once you’ve done governor removal and a Stage 1 kit.
For the RB200 and RT200 models, GoPowerSports makes a complete hydraulic front brake conversion kit that adds a front disc brake setup. For the CT200U series, upgrading from the drum to a proper disc setup on the rear is a meaningful safety improvement at higher speeds.
If your bike already has a disc brake (CT200U-EX, BT200X, and B200 series all do), the main focus is making sure the pads are in good shape and the fluid is fresh. But for riders on the base CT200U with drum brakes who have already started modding for speed, a brake upgrade is not optional. Go faster, stop better.
Cost: $180 to $220 for a hydraulic front brake conversion kit (model-specific).
Difficulty: Intermediate.
7. Stage 2 Internal Upgrades (For Serious Builds)
Stage 2 is the deep end. This is where you go inside the engine: billet flywheel, billet connecting rod, performance camshaft, and heavy-duty dual valve springs. It’s not a weekend project for a first-time wrench turner, but for someone who wants to build a genuinely fast mini bike, it’s the logical endpoint of the CT200U platform.
The billet flywheel reduces rotational mass for faster revving. The billet rod handles the stress of high-RPM use that the cast stock rod wasn’t designed for. The performance cam increases valve lift and duration for more power on the top end. Combined with everything from Mods 1 through 3, a Stage 2 build can push the 196cc engine into the 12 to 15 HP territory.
Some riders in the community have reported getting fully built CT200U-EX bikes to speeds in the 70 to 80 mph range with aggressive Stage 2 builds and gearing changes. At that point the bike’s frame, suspension, and brakes all need to be part of the conversation too.
Cost: $150 to $250 for internal components, plus labor if you’re not doing it yourself.
Difficulty: Advanced. Engine teardown and rebuild required.
The Right Order to Mod Your Coleman
If you’re starting from stock, here’s the order most experienced riders recommend:
- Governor removal + 18-pound valve springs
- Stage 1 performance kit (carb, exhaust, air filter)
- Torque converter
- Gear ratio adjustment if you want more top speed
- Front suspension kit if your riding terrain demands it
- Brake upgrade, especially if speeds have increased significantly
- Stage 2 internals for those going all the way
You don’t have to hit every step. Most riders land somewhere between step 2 and step 4 and are genuinely happy with where the bike ends up. The platform responds well at every stage of the build.